Brakayla the Vanagon’s Rust Repair - What we Found (and what it’s taking to fix it)
Hey there!! It’s been a little while — OK, a couple years — since we’ve sat down to write a proper blog entry. Not for a lack of stories, just a mix of life happening, being on the road, and honestly, laziness & procrastination lol. This latest chapter, however, definitely needs documenting.
Over the past few years, we had been noticing more & more little rust bubbles popping up under our Vanagon’s exterior bedliner coating. It was beginning to spread, so last summer we decided it was best to take Brakayla off the road for a while for repair before it got too bad. But, where, and more importantly, who could we trust to do the work?

A couple minutes of lightly scraping with a screwdriver led to us finding the first of several rust holes.
Leaving our van for repair at a shop several states away for months on end was not ideal. We had already been through that nightmare back in 2023 when she was left in New Mexico getting her engine replaced. What should’ve been a 2-3 week job turned into a few months. Becky & I bounced around a few ideas, and regrettably agreed to choose a shop several states away that we had some friendly conversations with over the years on Instagram.
We were ready to call and set things up when last summer we met our new friend Larry at the V-Dub Derby car show here in Louisville, Kentucky. We were in the midst of packing things up for the day, when a guy walked over and introduced himself. He mentioned he was in the middle of building out his own Vanagon. He had a few questions — mostly about how we use ours — because, as he put it, it seemed like we were actually putting the van to use the way it was intended: getting out, traveling, and chasing adventure. As we got to talking, Larry told me he had spent decades working in auto body repair. That immediately caught my attention. As our conversation was ending, I asked him if repairing our Vanagon was something he’d consider taking on. He said he’d absolutely be interested.
Something about that initial conversation told me Larry just might be the right person for the job. After a few more conversations via text message, I decided there was no better fit than Larry to take care of our precious Brakayla. And, him living here in Louisville was an added bonus!
We got the ball rolling last November when Becky and I spent a weekend stripping the interior from the van. We subsequently dropped it off to Larry the following week for a thorough assessment. We knew there would be some surprises. What we didn’t know was how many.
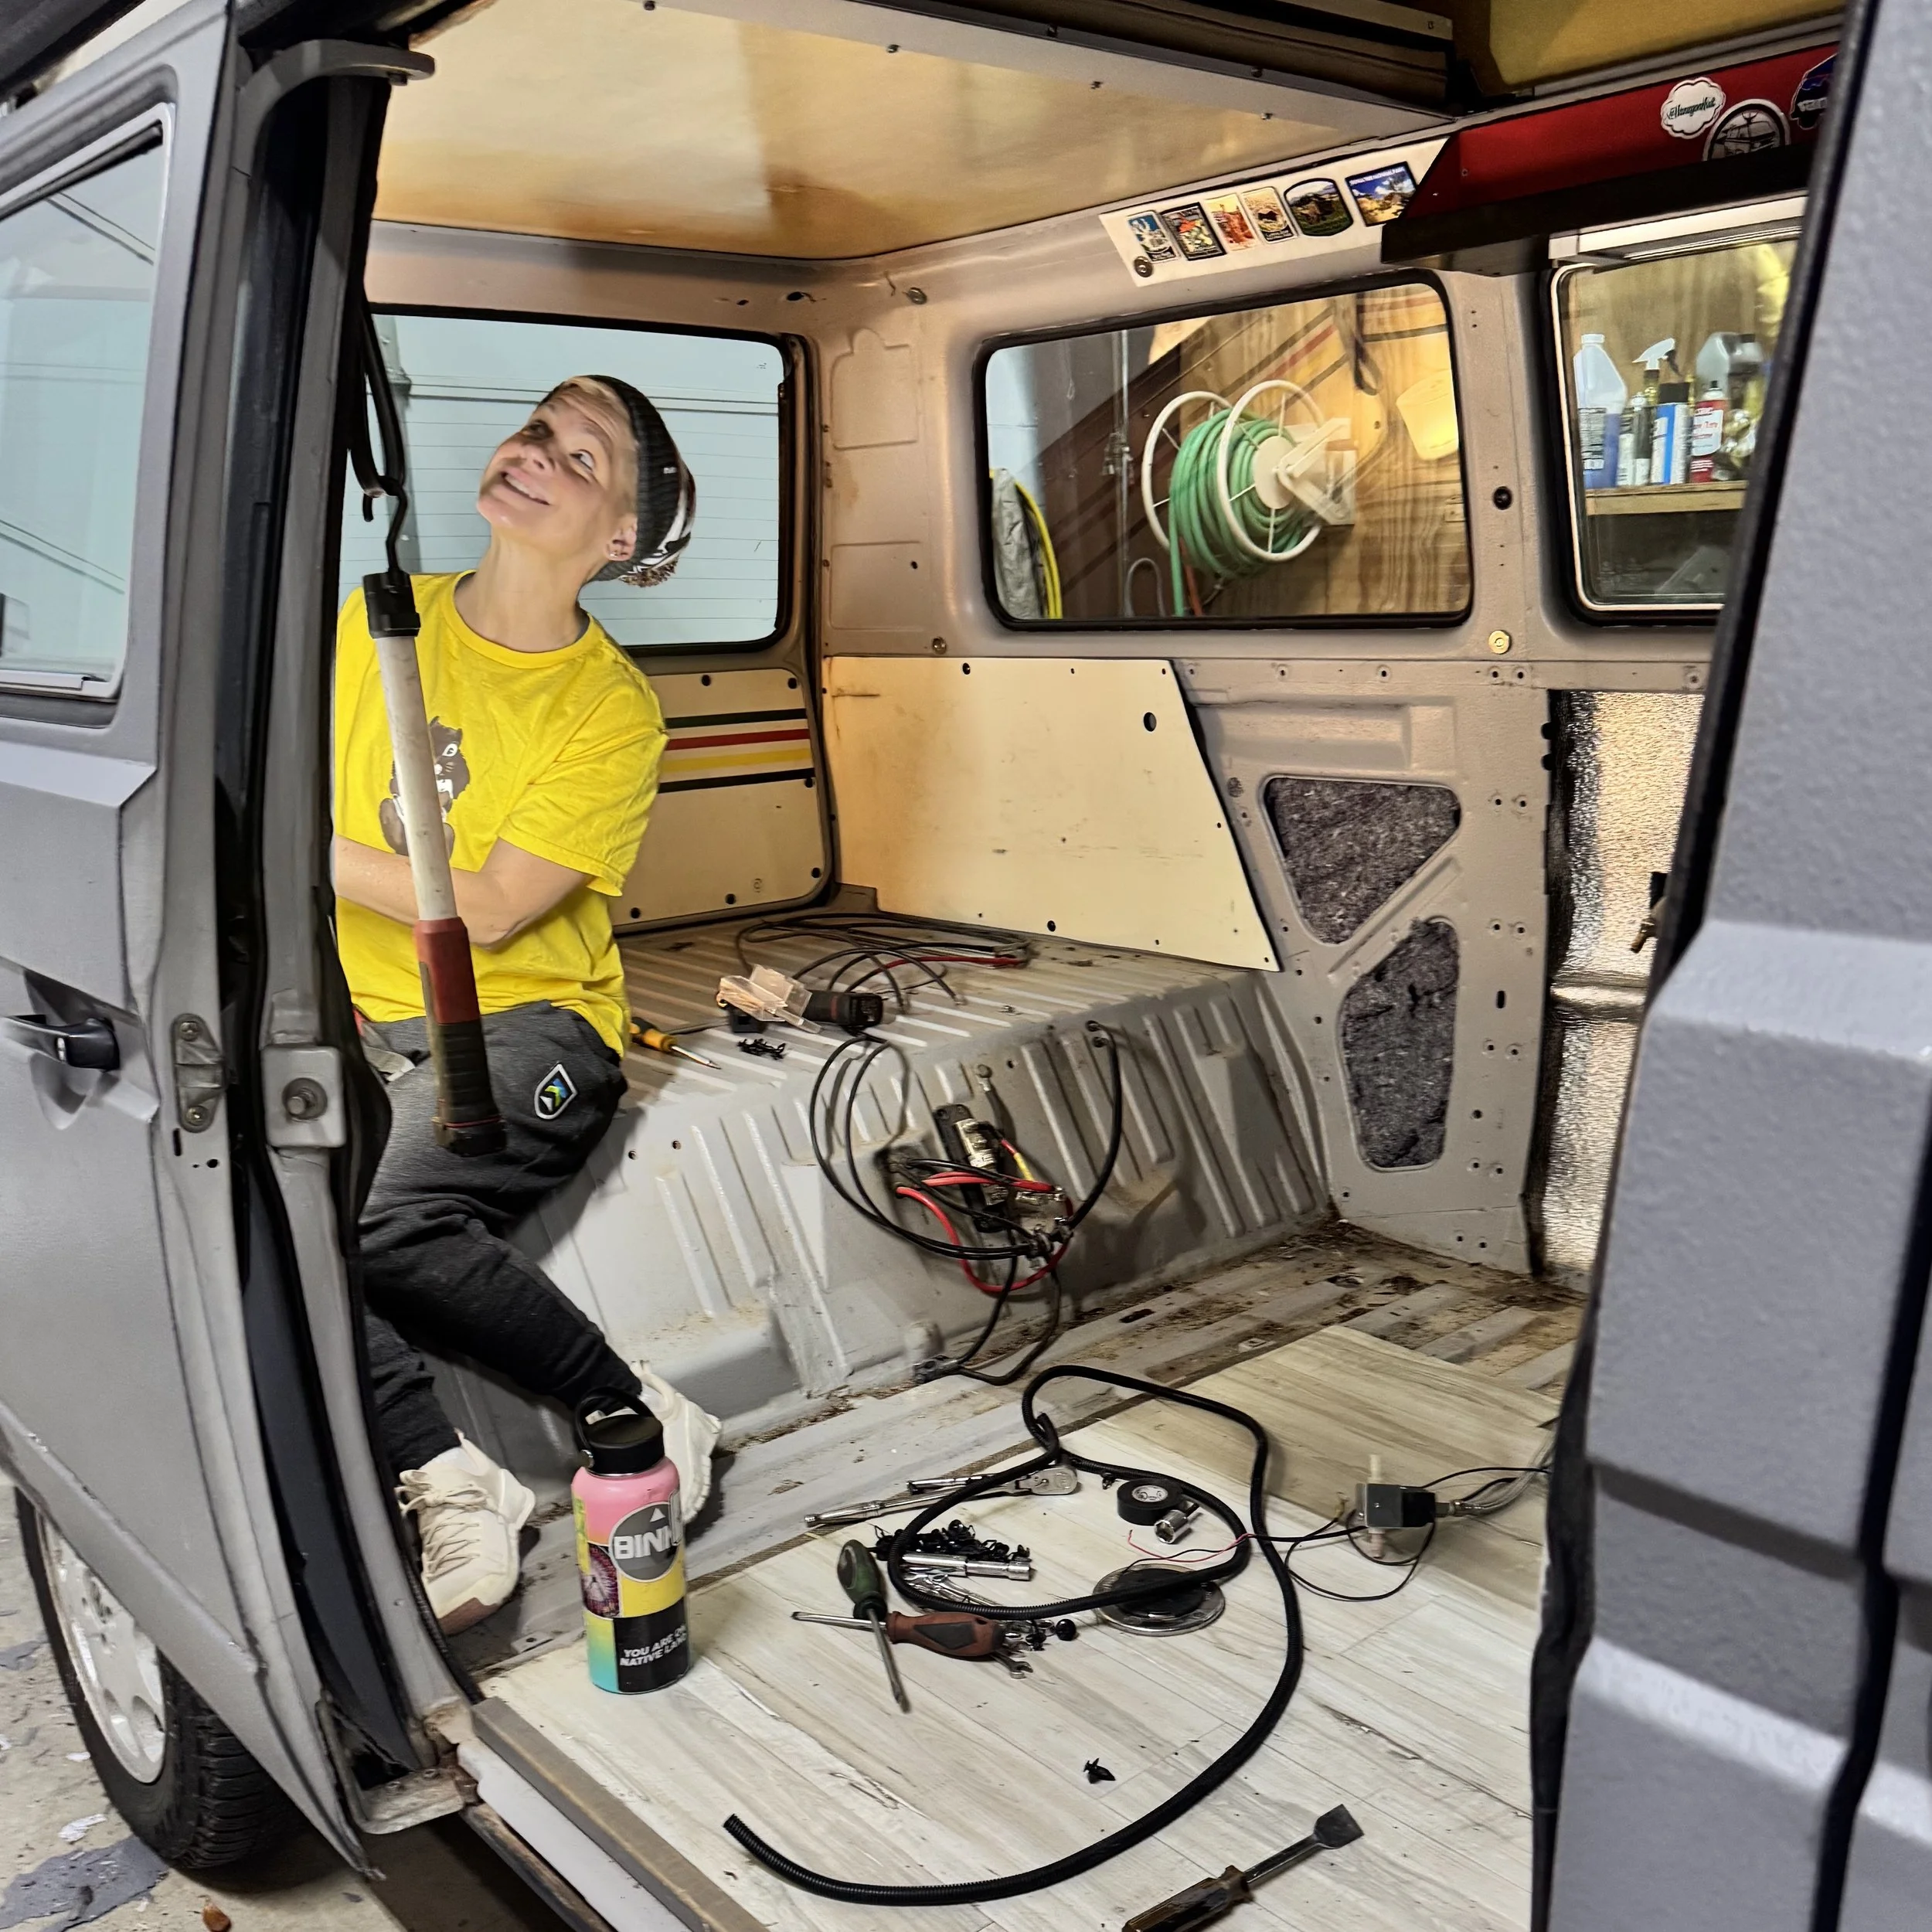
Was a loooong day of removing cabinets, wiring, gear, etc. to prep for Larry’s full assessment!
From the start, Larry took a methodical approach stripping things back, exposing the problem areas, and figuring out whether we were dealing with repairable sections or full panel replacements. First part of his process? Removing the Monstaliner paint. As soon as the bedliner started coming off, the real story underneath began to show. Some areas were exactly what we expected: surface rust, tired seams, aging repairs. Others…not so much. Under what looked like perfectly solid sections was Bondo covering hidden rust. In one spot, it looked like someone had used some cheap, moisture-absorbing filler, basically the worst-case scenario for long-term durability.
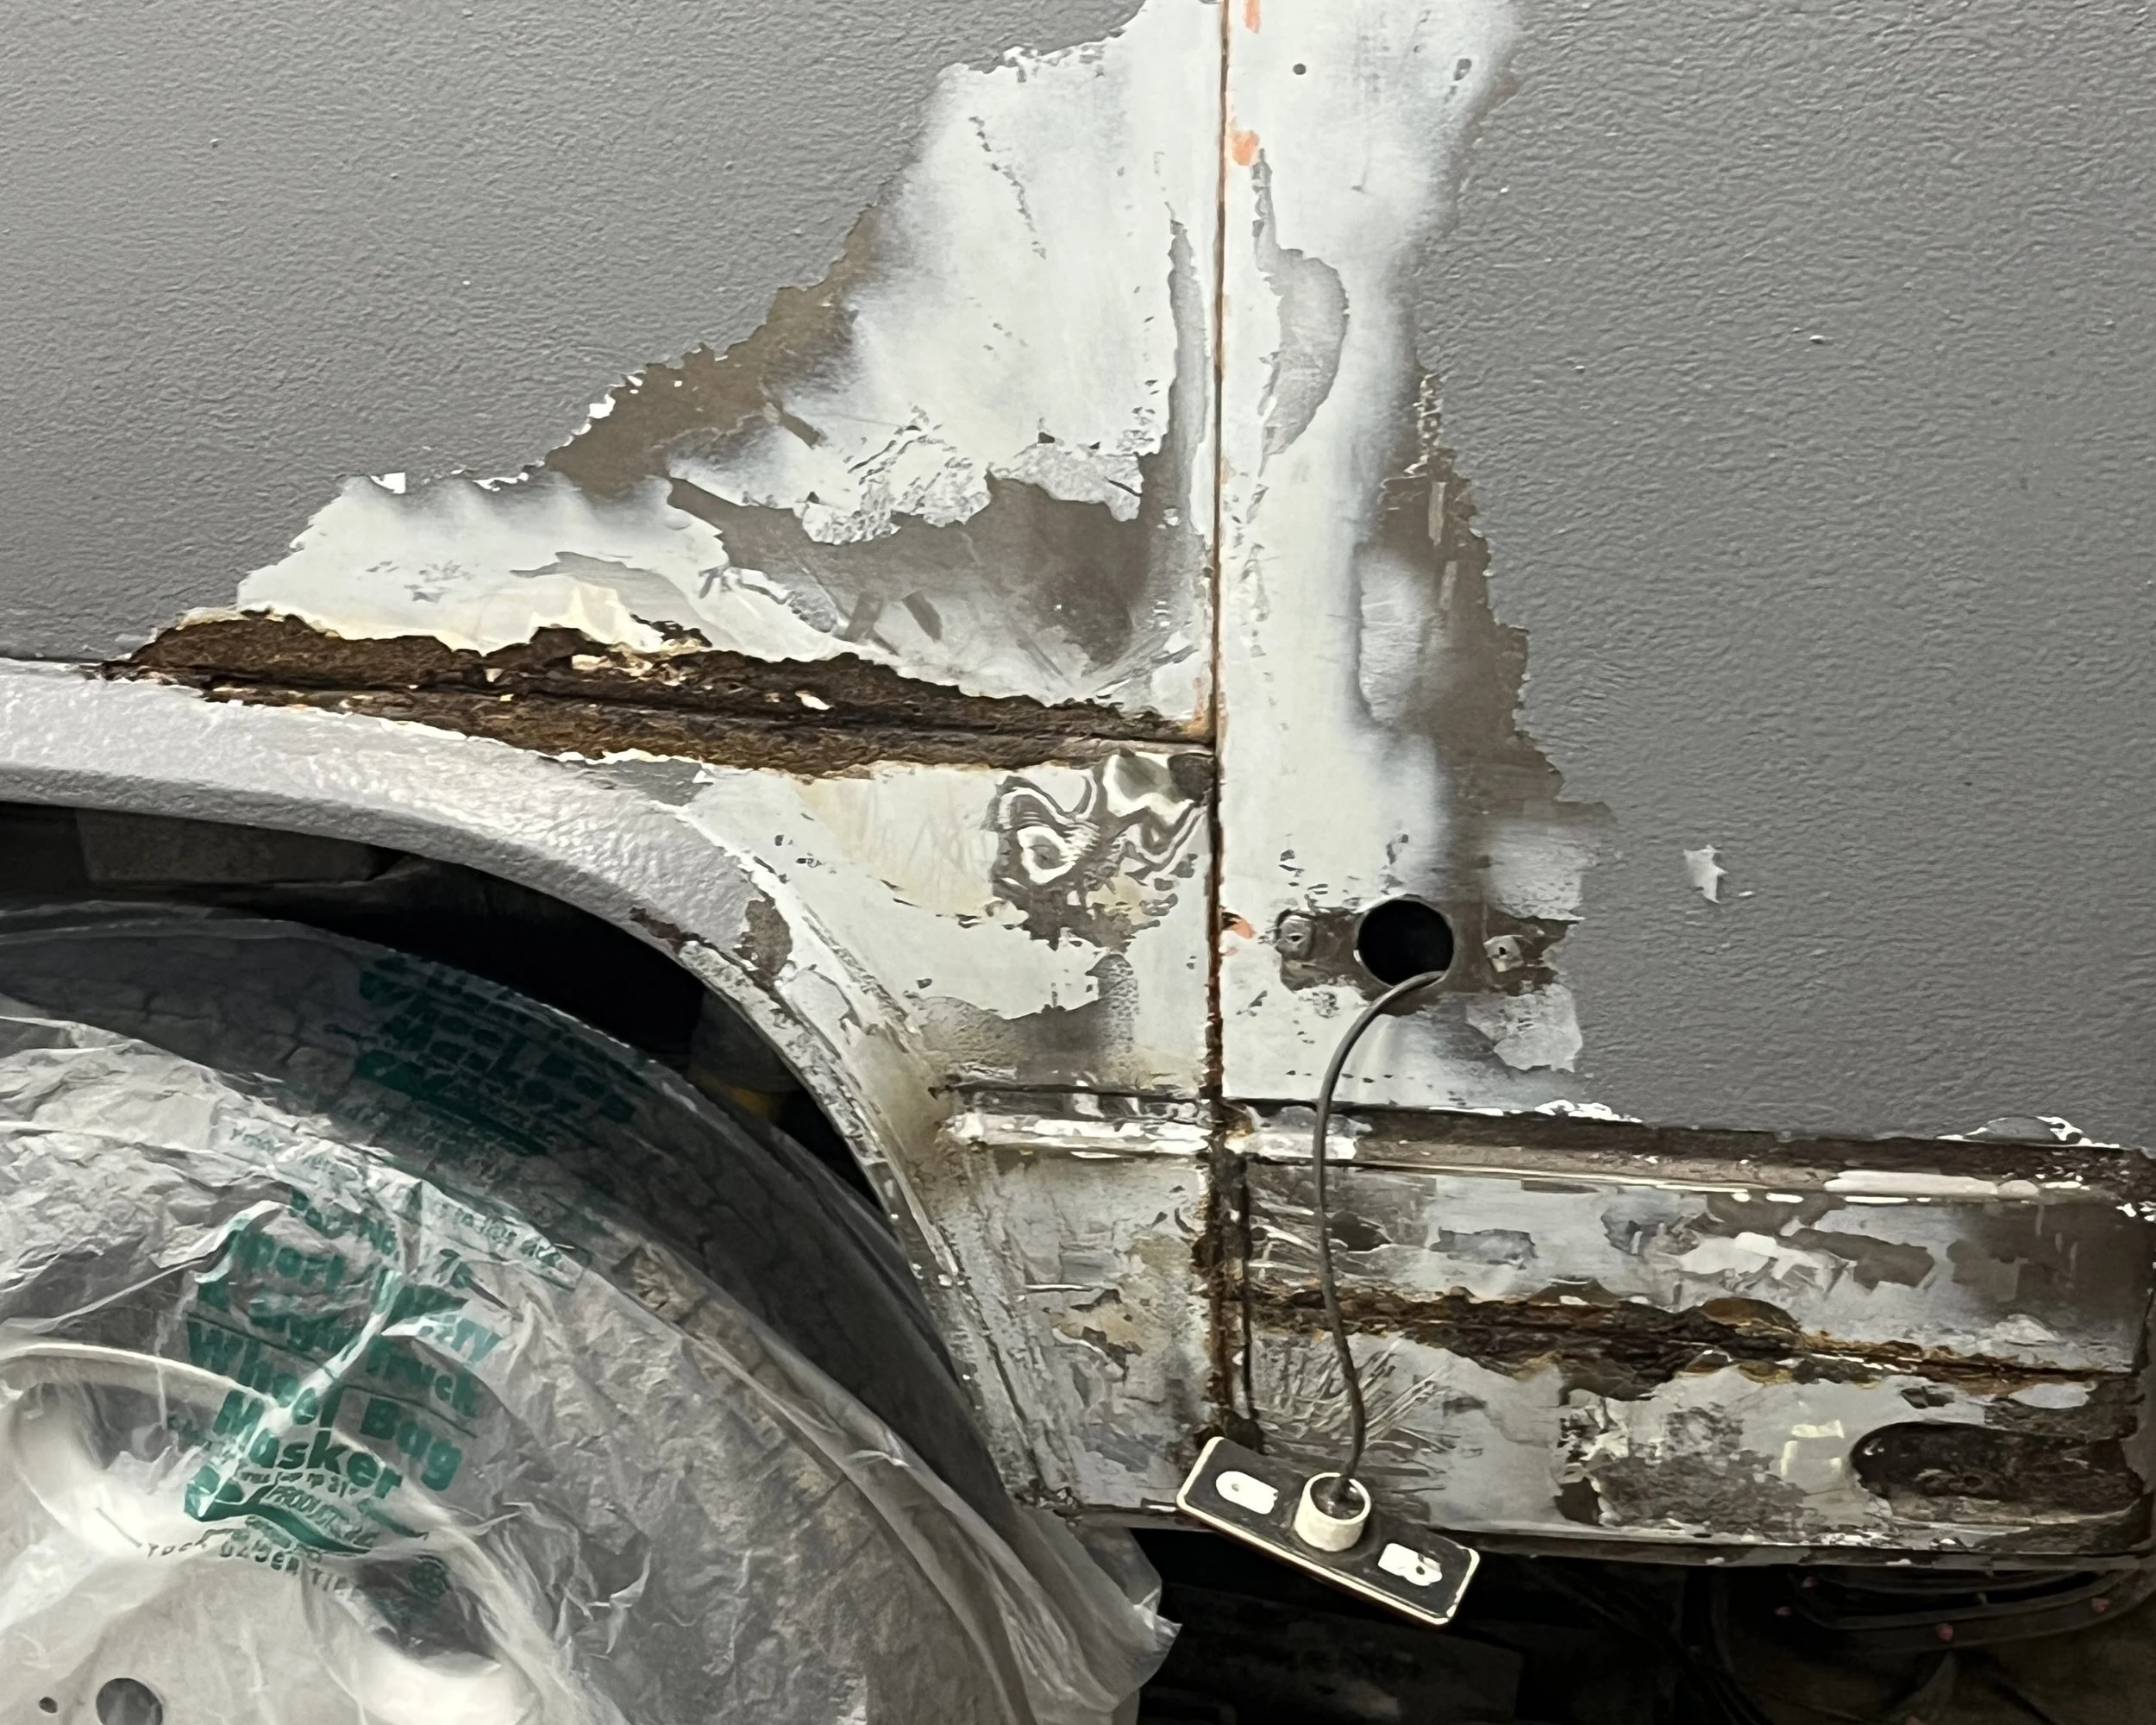
The ugliness hiding under the Monstaliner!
Blah!!
The tricky part with older vehicles like these is you’re not just dealing with rust, you’re dealing with everyone who tried to fix it before you.
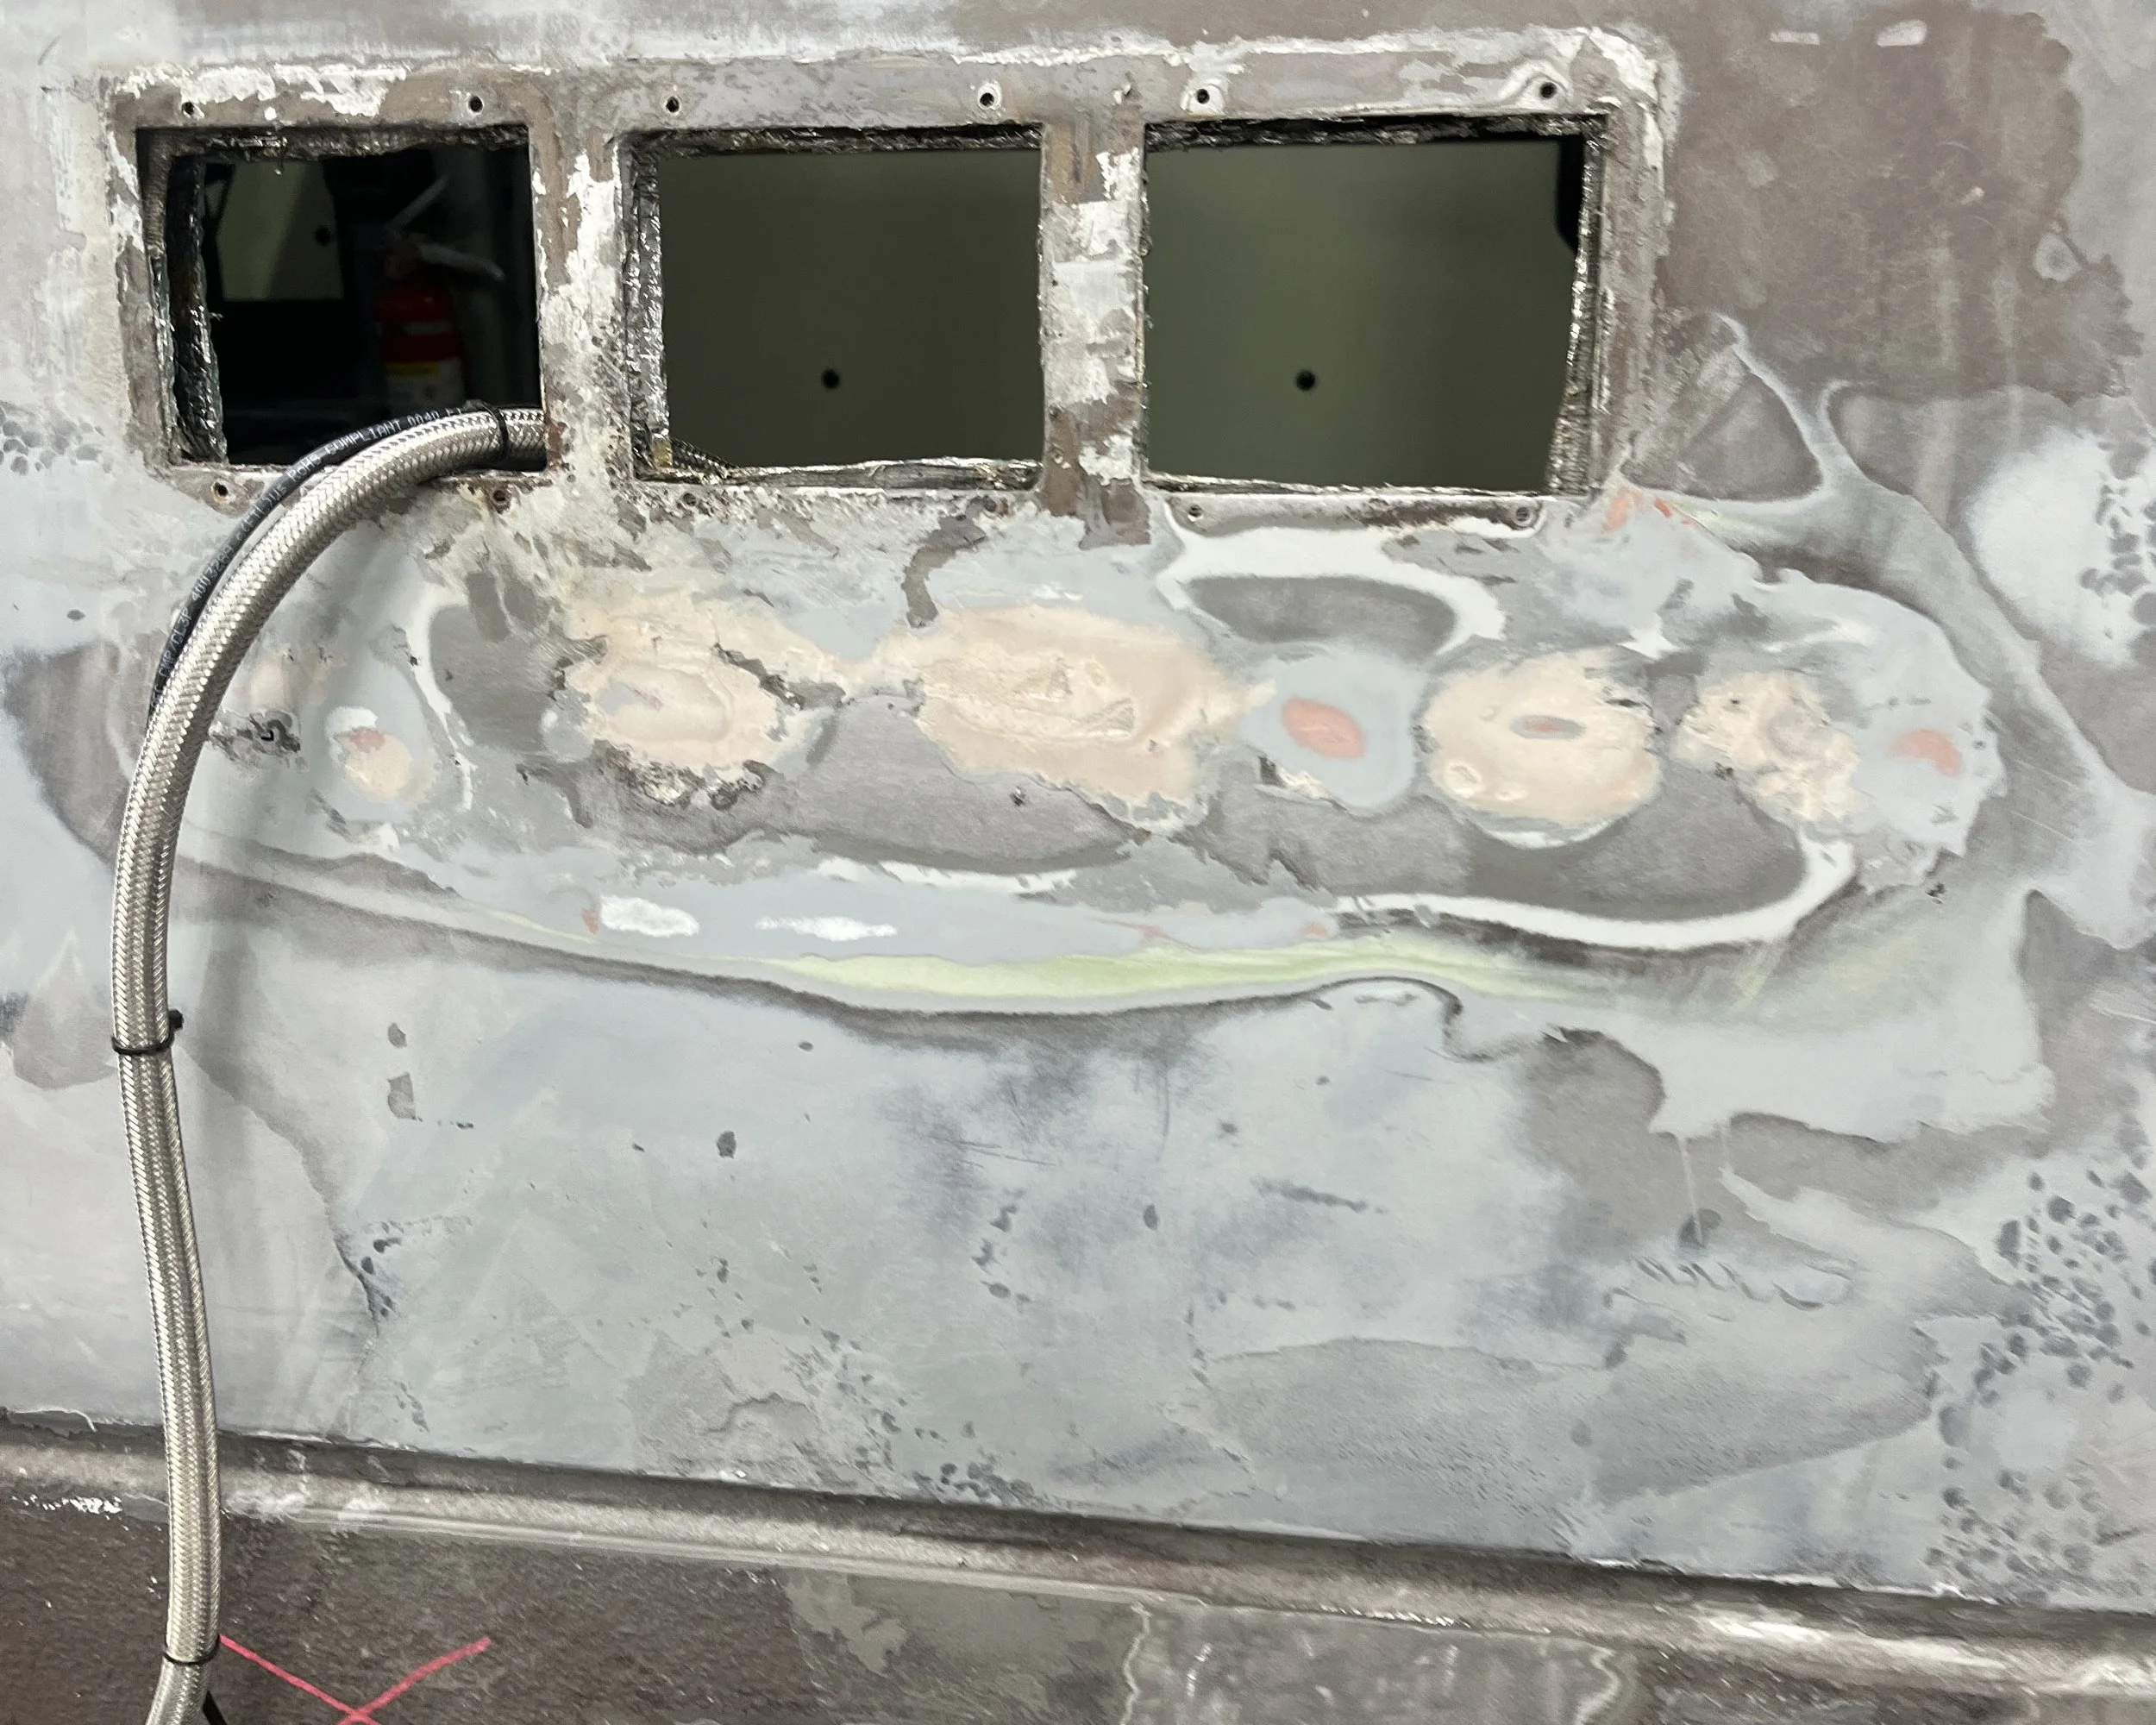
Not all the past work was bad though. Inside the kitchen wall area, there had clearly been major repairs done before. The previous builder used galvanized metal and fiberglass, and structurally, it had actually held up pretty well. However, some of the previous repair was rough, and it interfered with properly replacing the new exterior panels. So instead of working around it, Larry made the call to remove the fiberglass work entirely and reassess what’s underneath.
Larry a found a few more things during his assessment:
Old seam fillers breaking down and letting rust creep in
Wheelhouses that needed replaced or reworking
A surprise hole where, at one point, a critter had made itself a home.
*This is the kind of stuff you only find once you fully committed to tearing into it.
The panels we agreed on replacing:
Both Rear Side Panels with Wheel Arches
Complete Left Side Center Panels
Complete Left Rear Corner Panel
Right Outer Rocker/Side Panel
Both Rear Lower Corner Body Panels
Left B-Pillar Lower Panel
*We sourced these replacement panels from Bus Depot for a total of approximately $1500 including freight. Ouch.
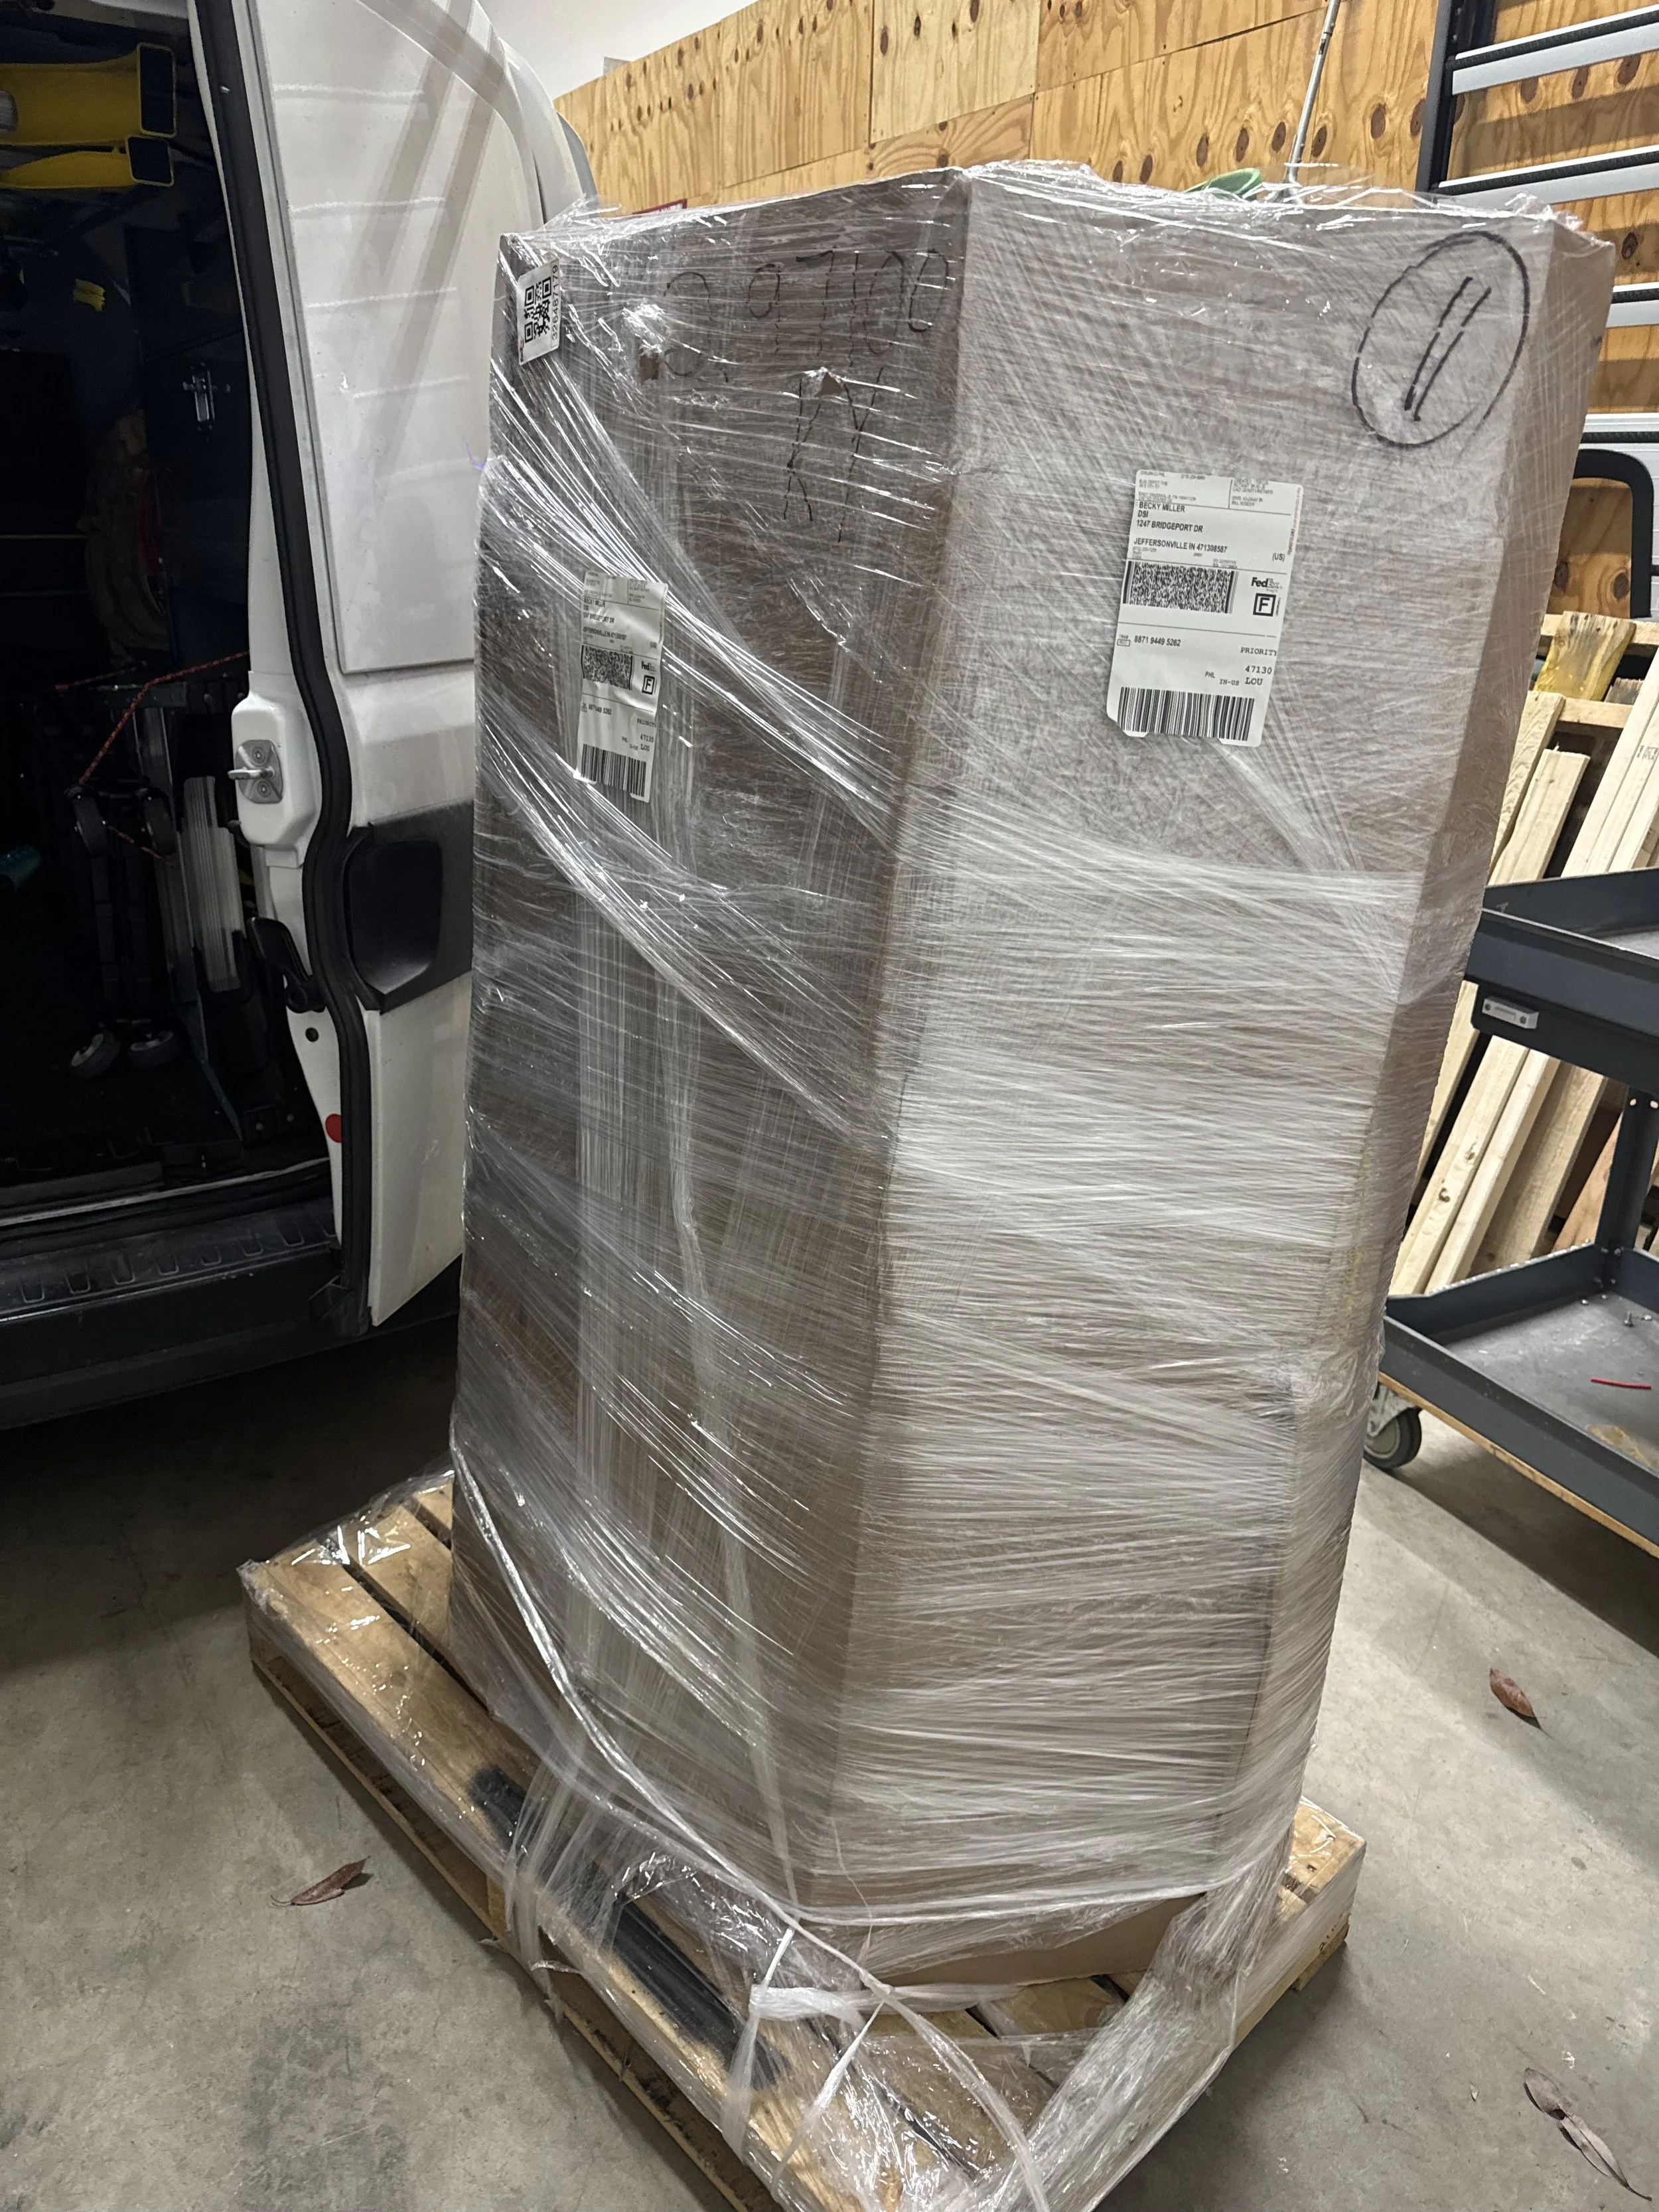
We should’ve taken a photo of the aftermath of plastic wrap and cardboard used to package up the panels — Holy Cow what a mess!!
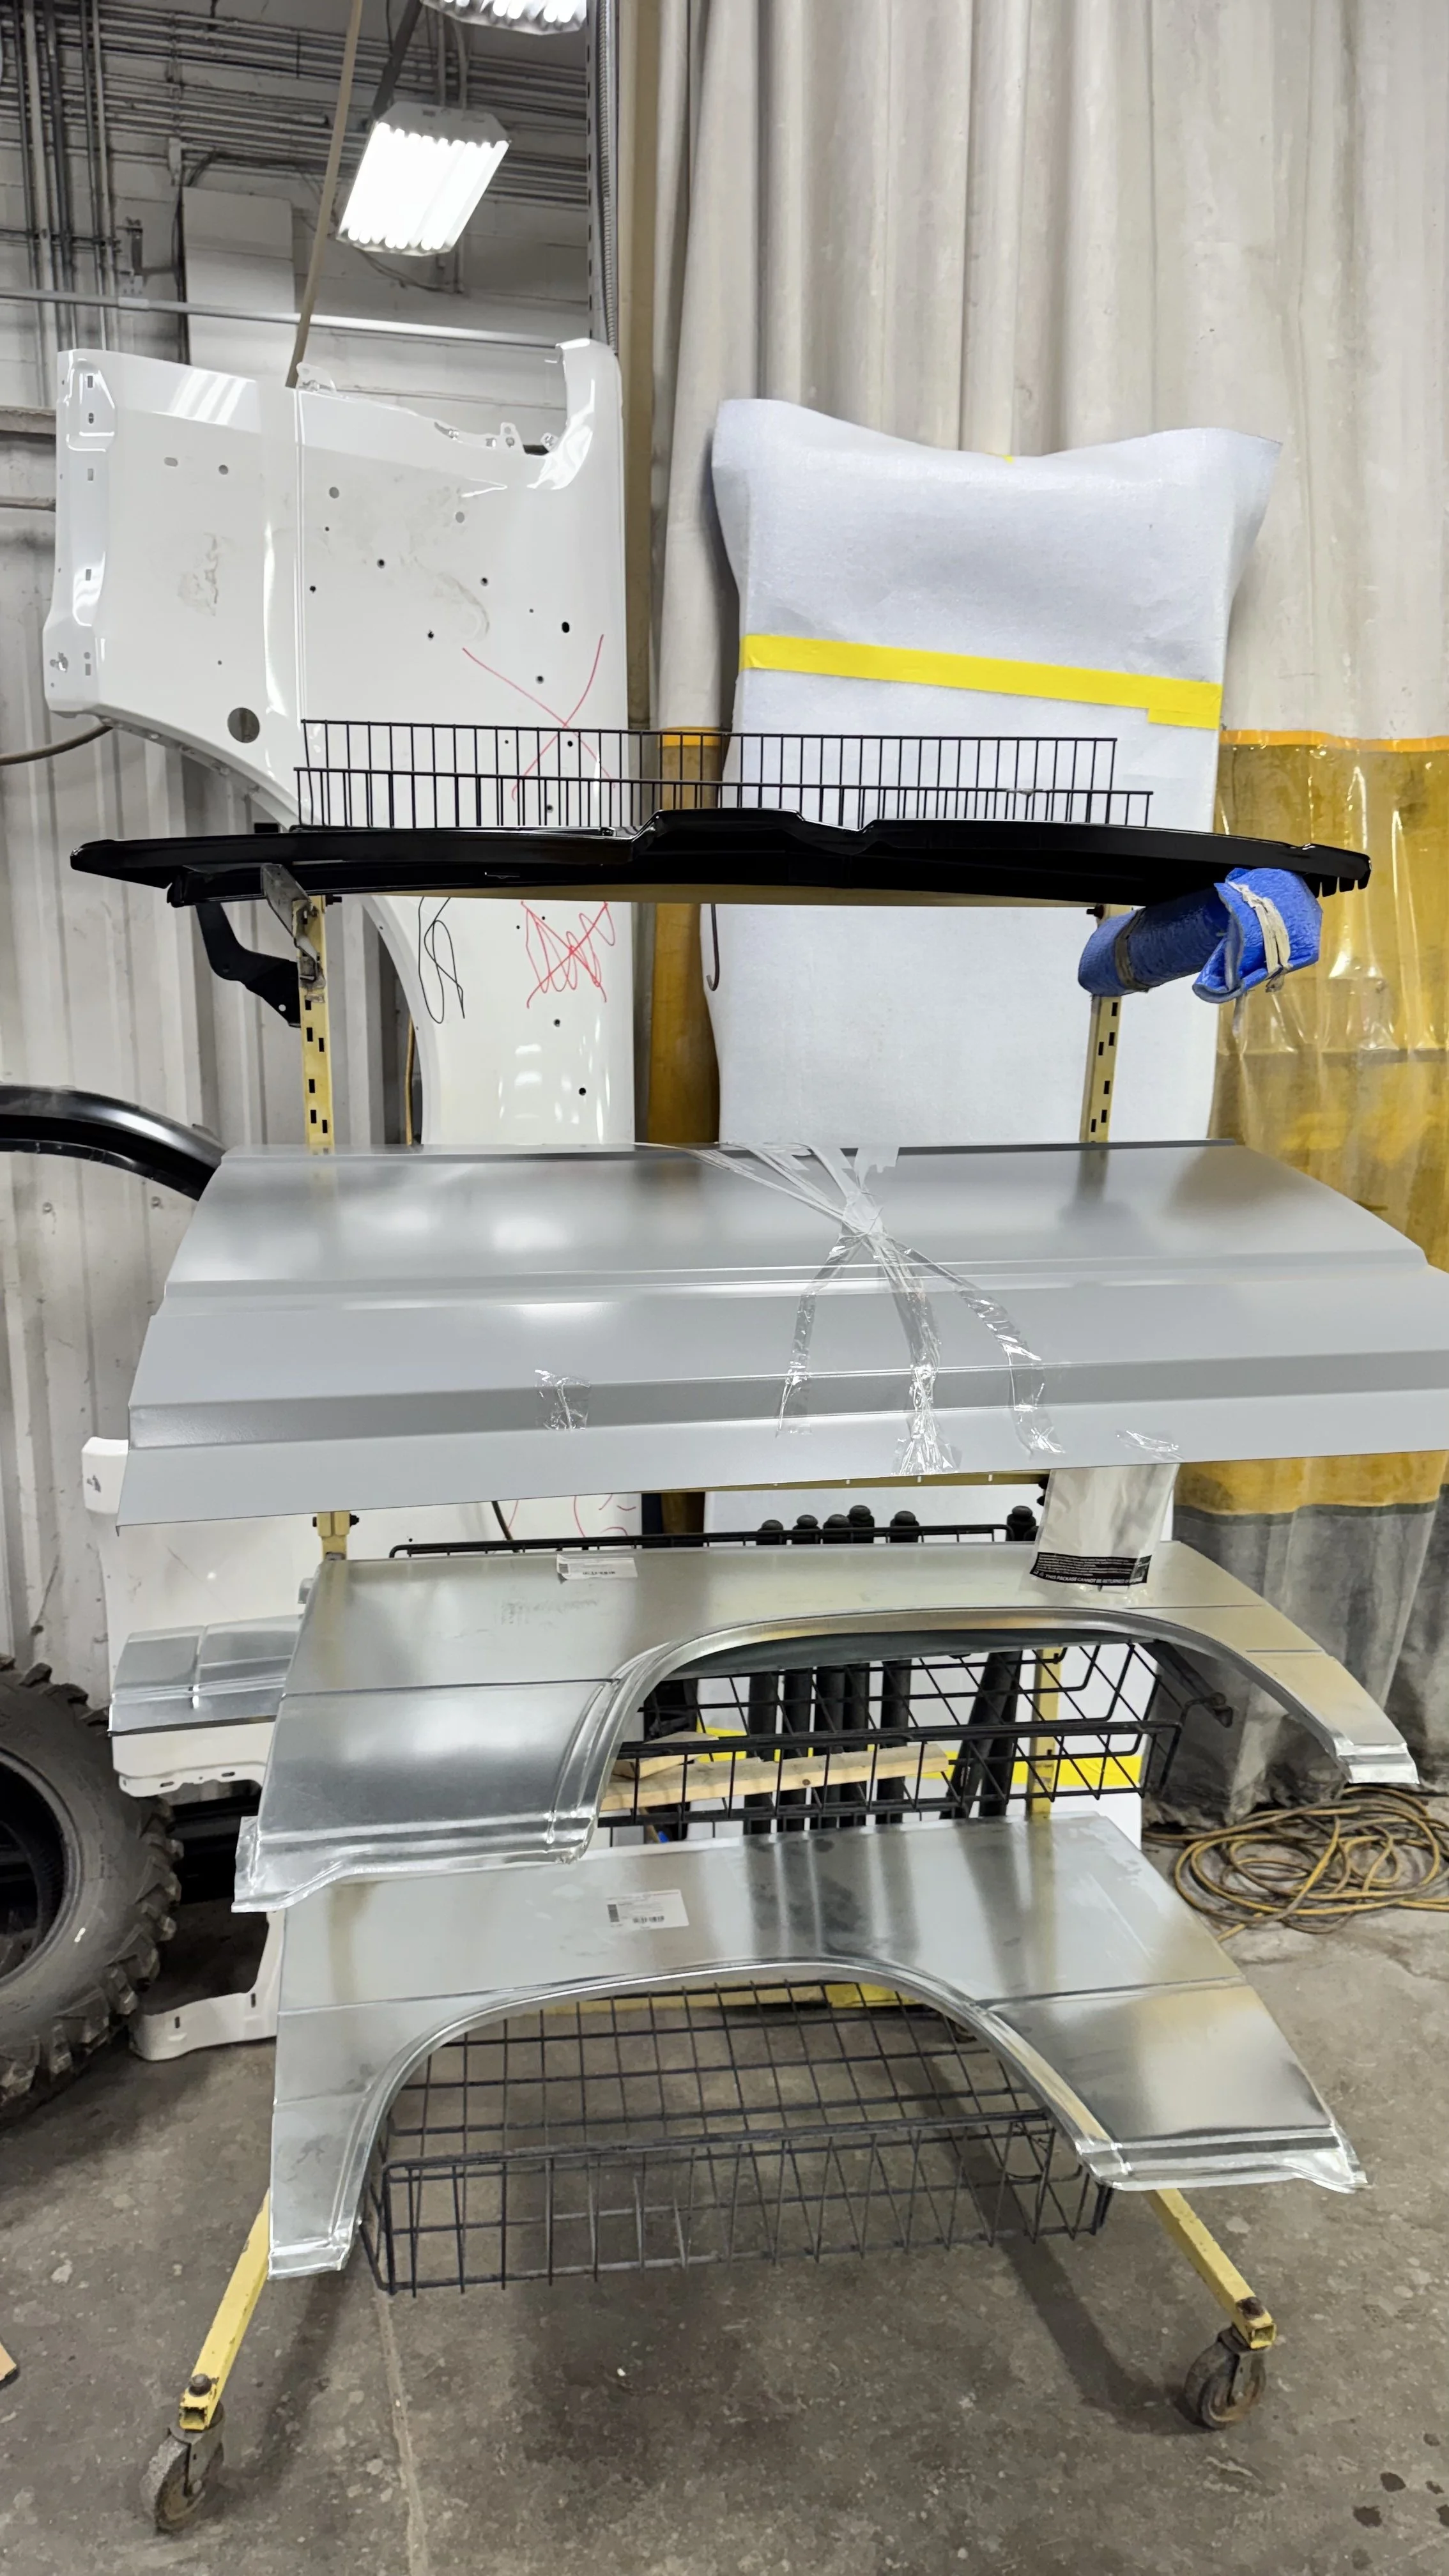
The shiny new panels!
While the panels were in transit, Larry began digging in beyond the obvious damage to chase and repair any other rust wherever it showed possible signs of spreading. That meant removing/replacing all the old seam sealer and treating any necessary areas with rust inhibitor. It’s slower, more detailed work, but it’s the difference between a repair that lasts a few years and one that actually holds up. Brakayla is a “forever van” to us, so we had prepared to take the time and money to ensure she’ll last a lifetime.
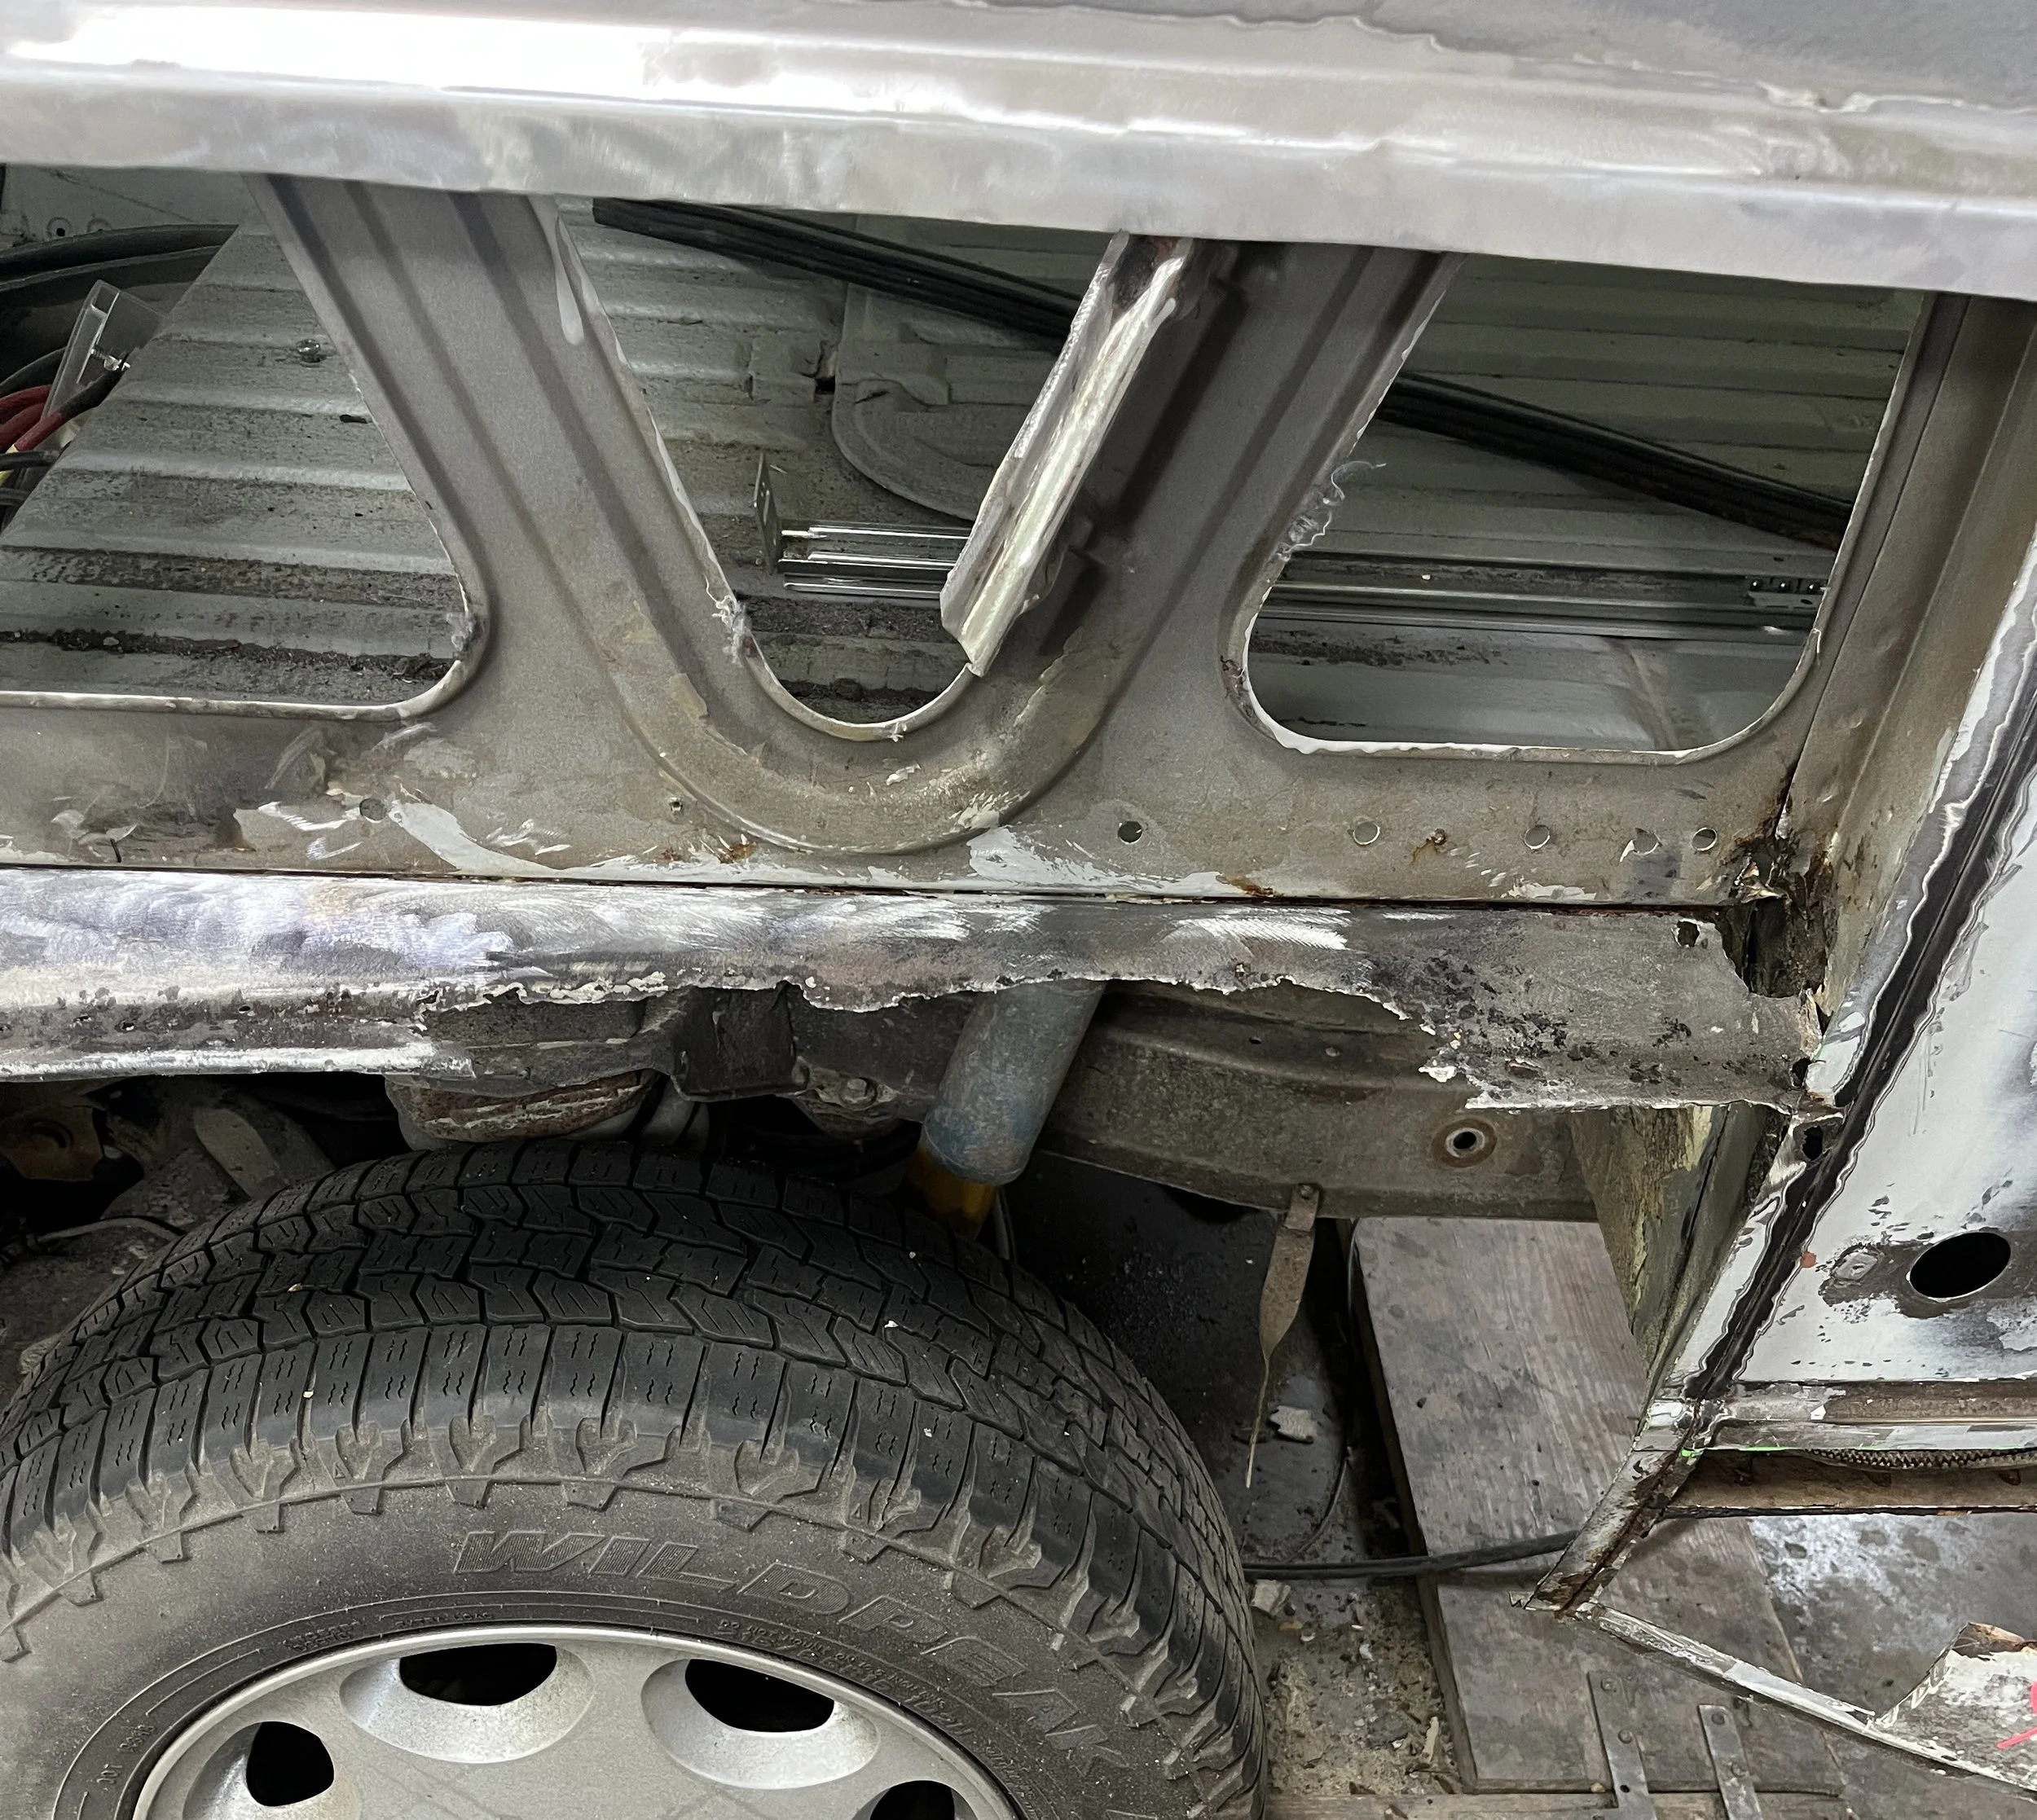
You never know what lies beneath the surface until you really dive into it!
Once Larry began fitting the new panels, we quickly learned not all replacement panels are created equal. A few of them turned out to be more like rough templates than true bolt-on parts. They required reshaping, trimming, and fabricating just to get them to fit correctly. In Larry’s words: “Wow… they suck.” So even with brand new replacement panels, there can still a lot of custom work involved. Larry said it’s been a constant balancing act between aligning the panels and trying to keep the body lines clean all while making sure everything’s structurally sound underneath. Sometimes that means “splitting the difference” or doing extra fabrication work just to get things looking right.
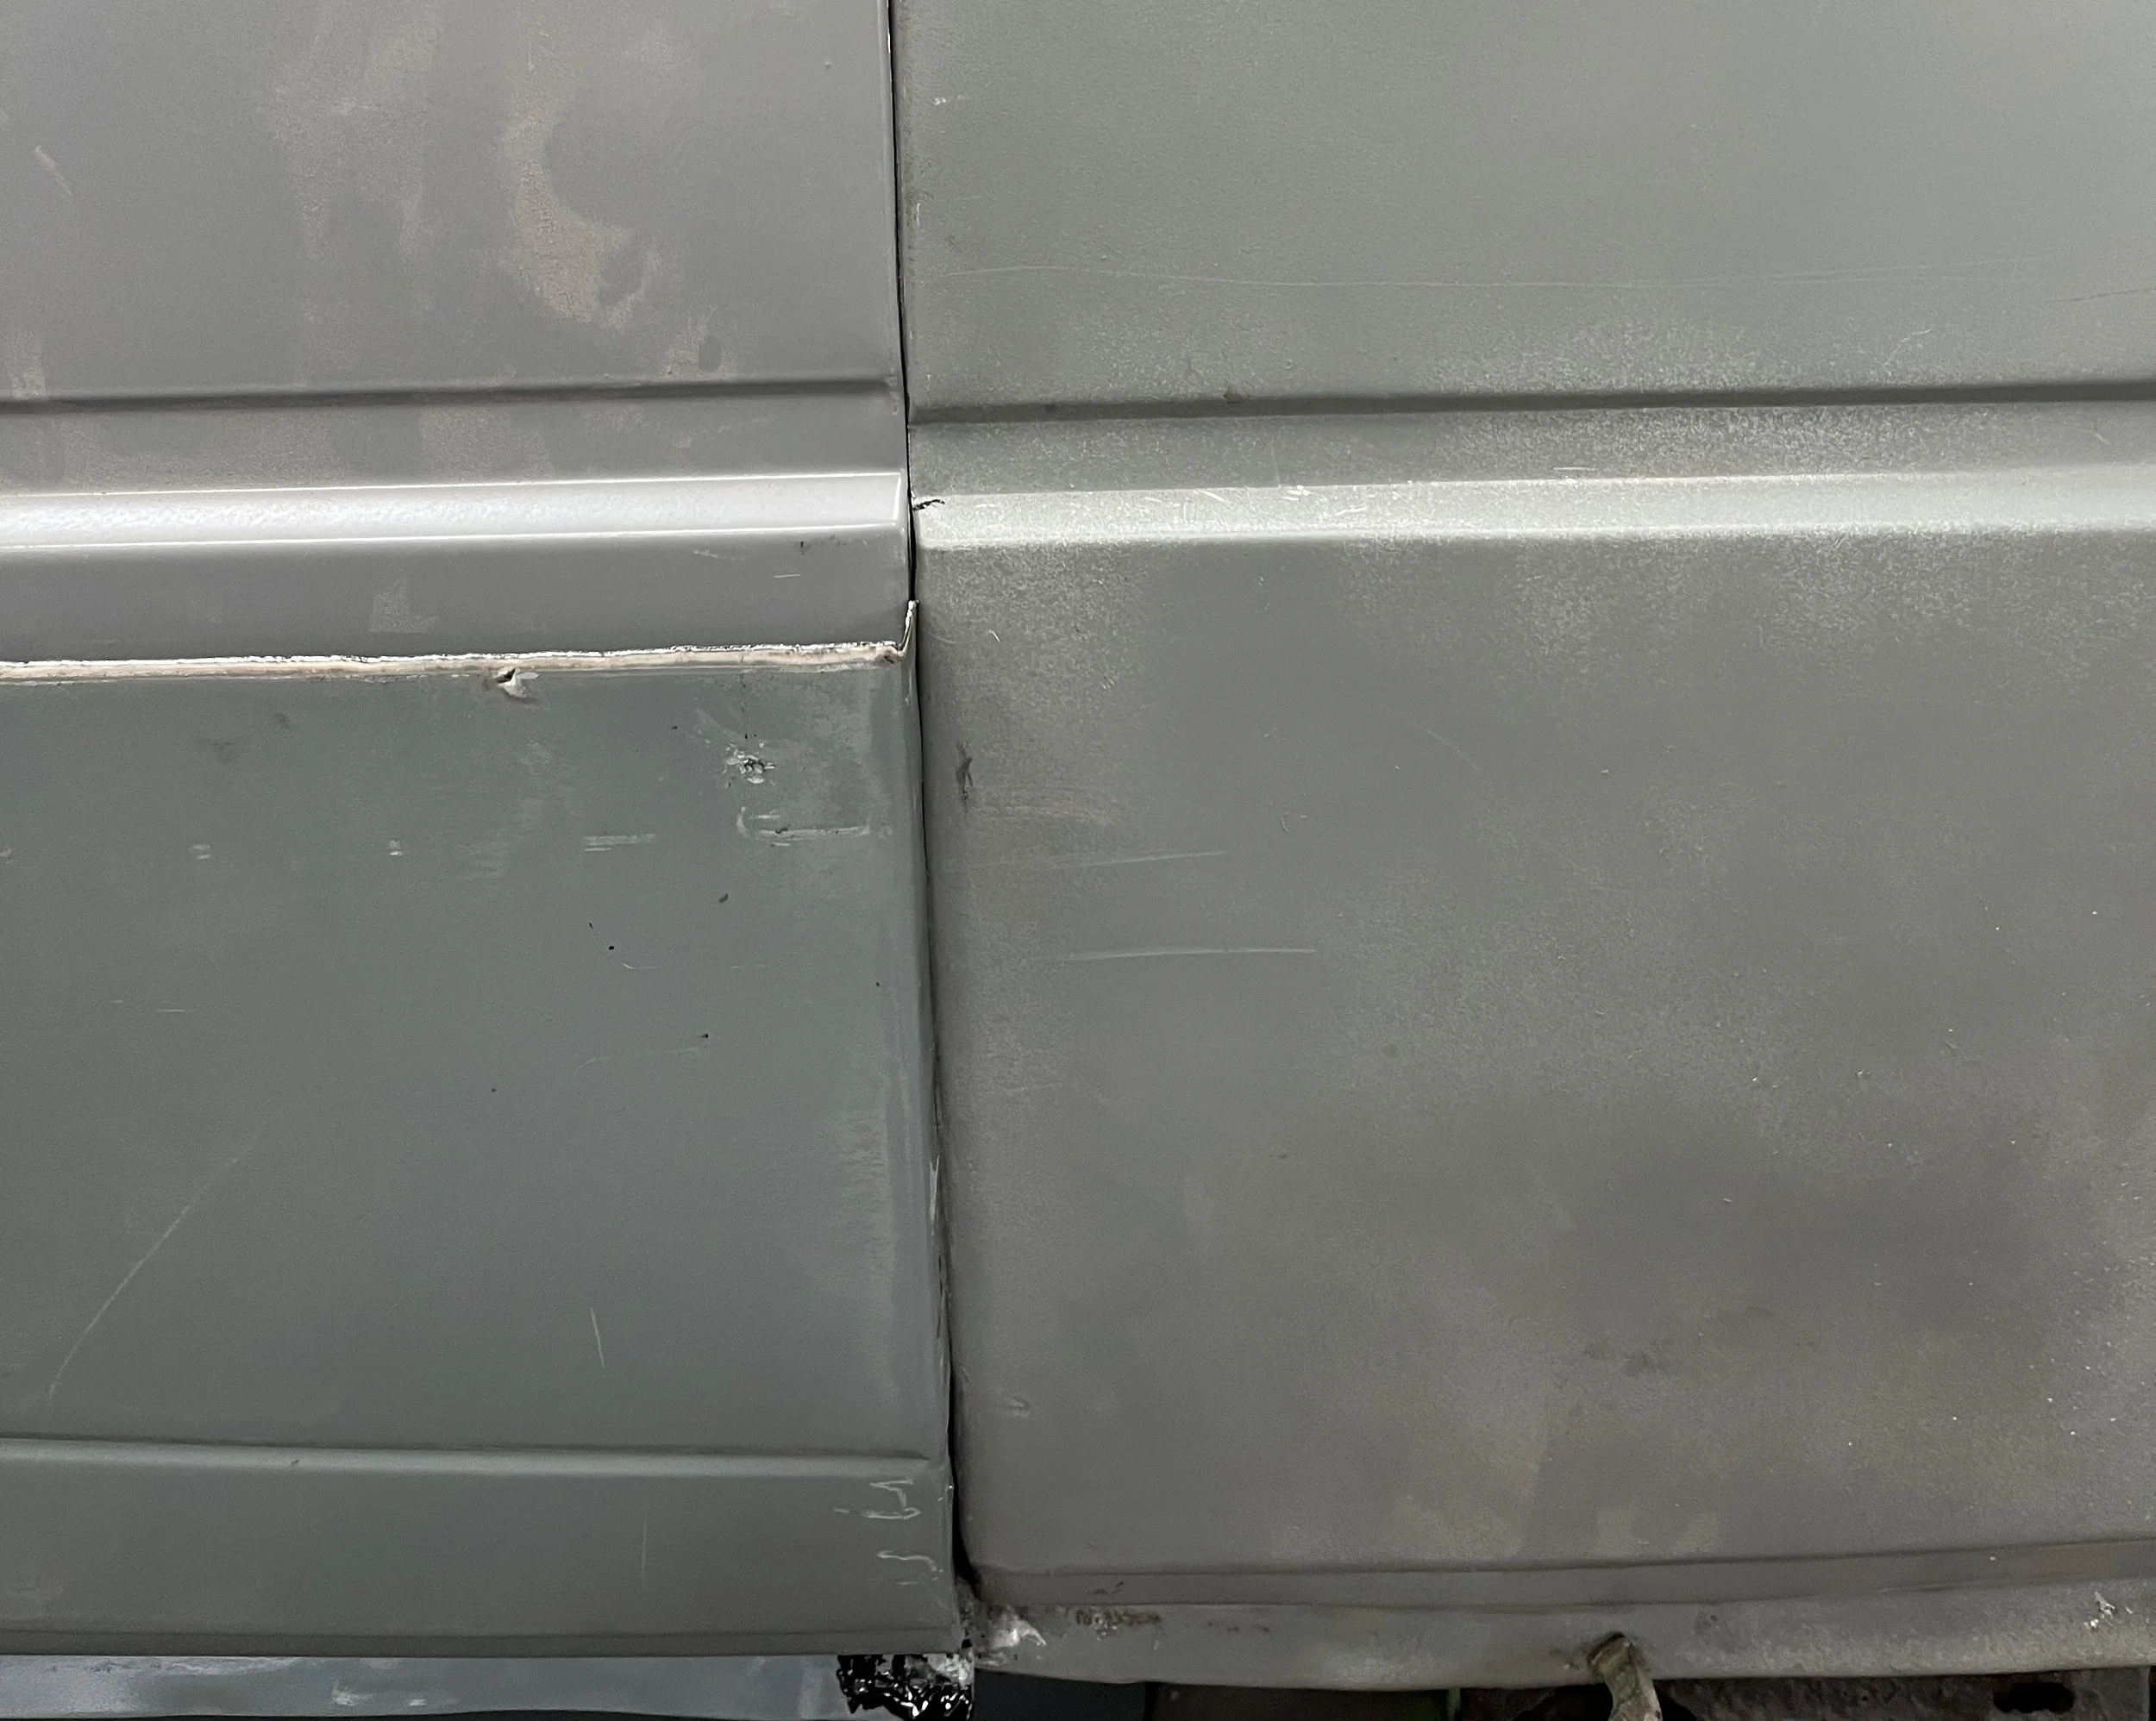
As you can see, the aftermarket panels aren’t exactly bolt-on replacements.
At one point during the process, rust was also found to the left of the engine cover where the cabinet sits. Larry cut a clean section from his own Vanagon to patch that part of the rear floor. Doing so was much faster and better than fabricating it from scratch.
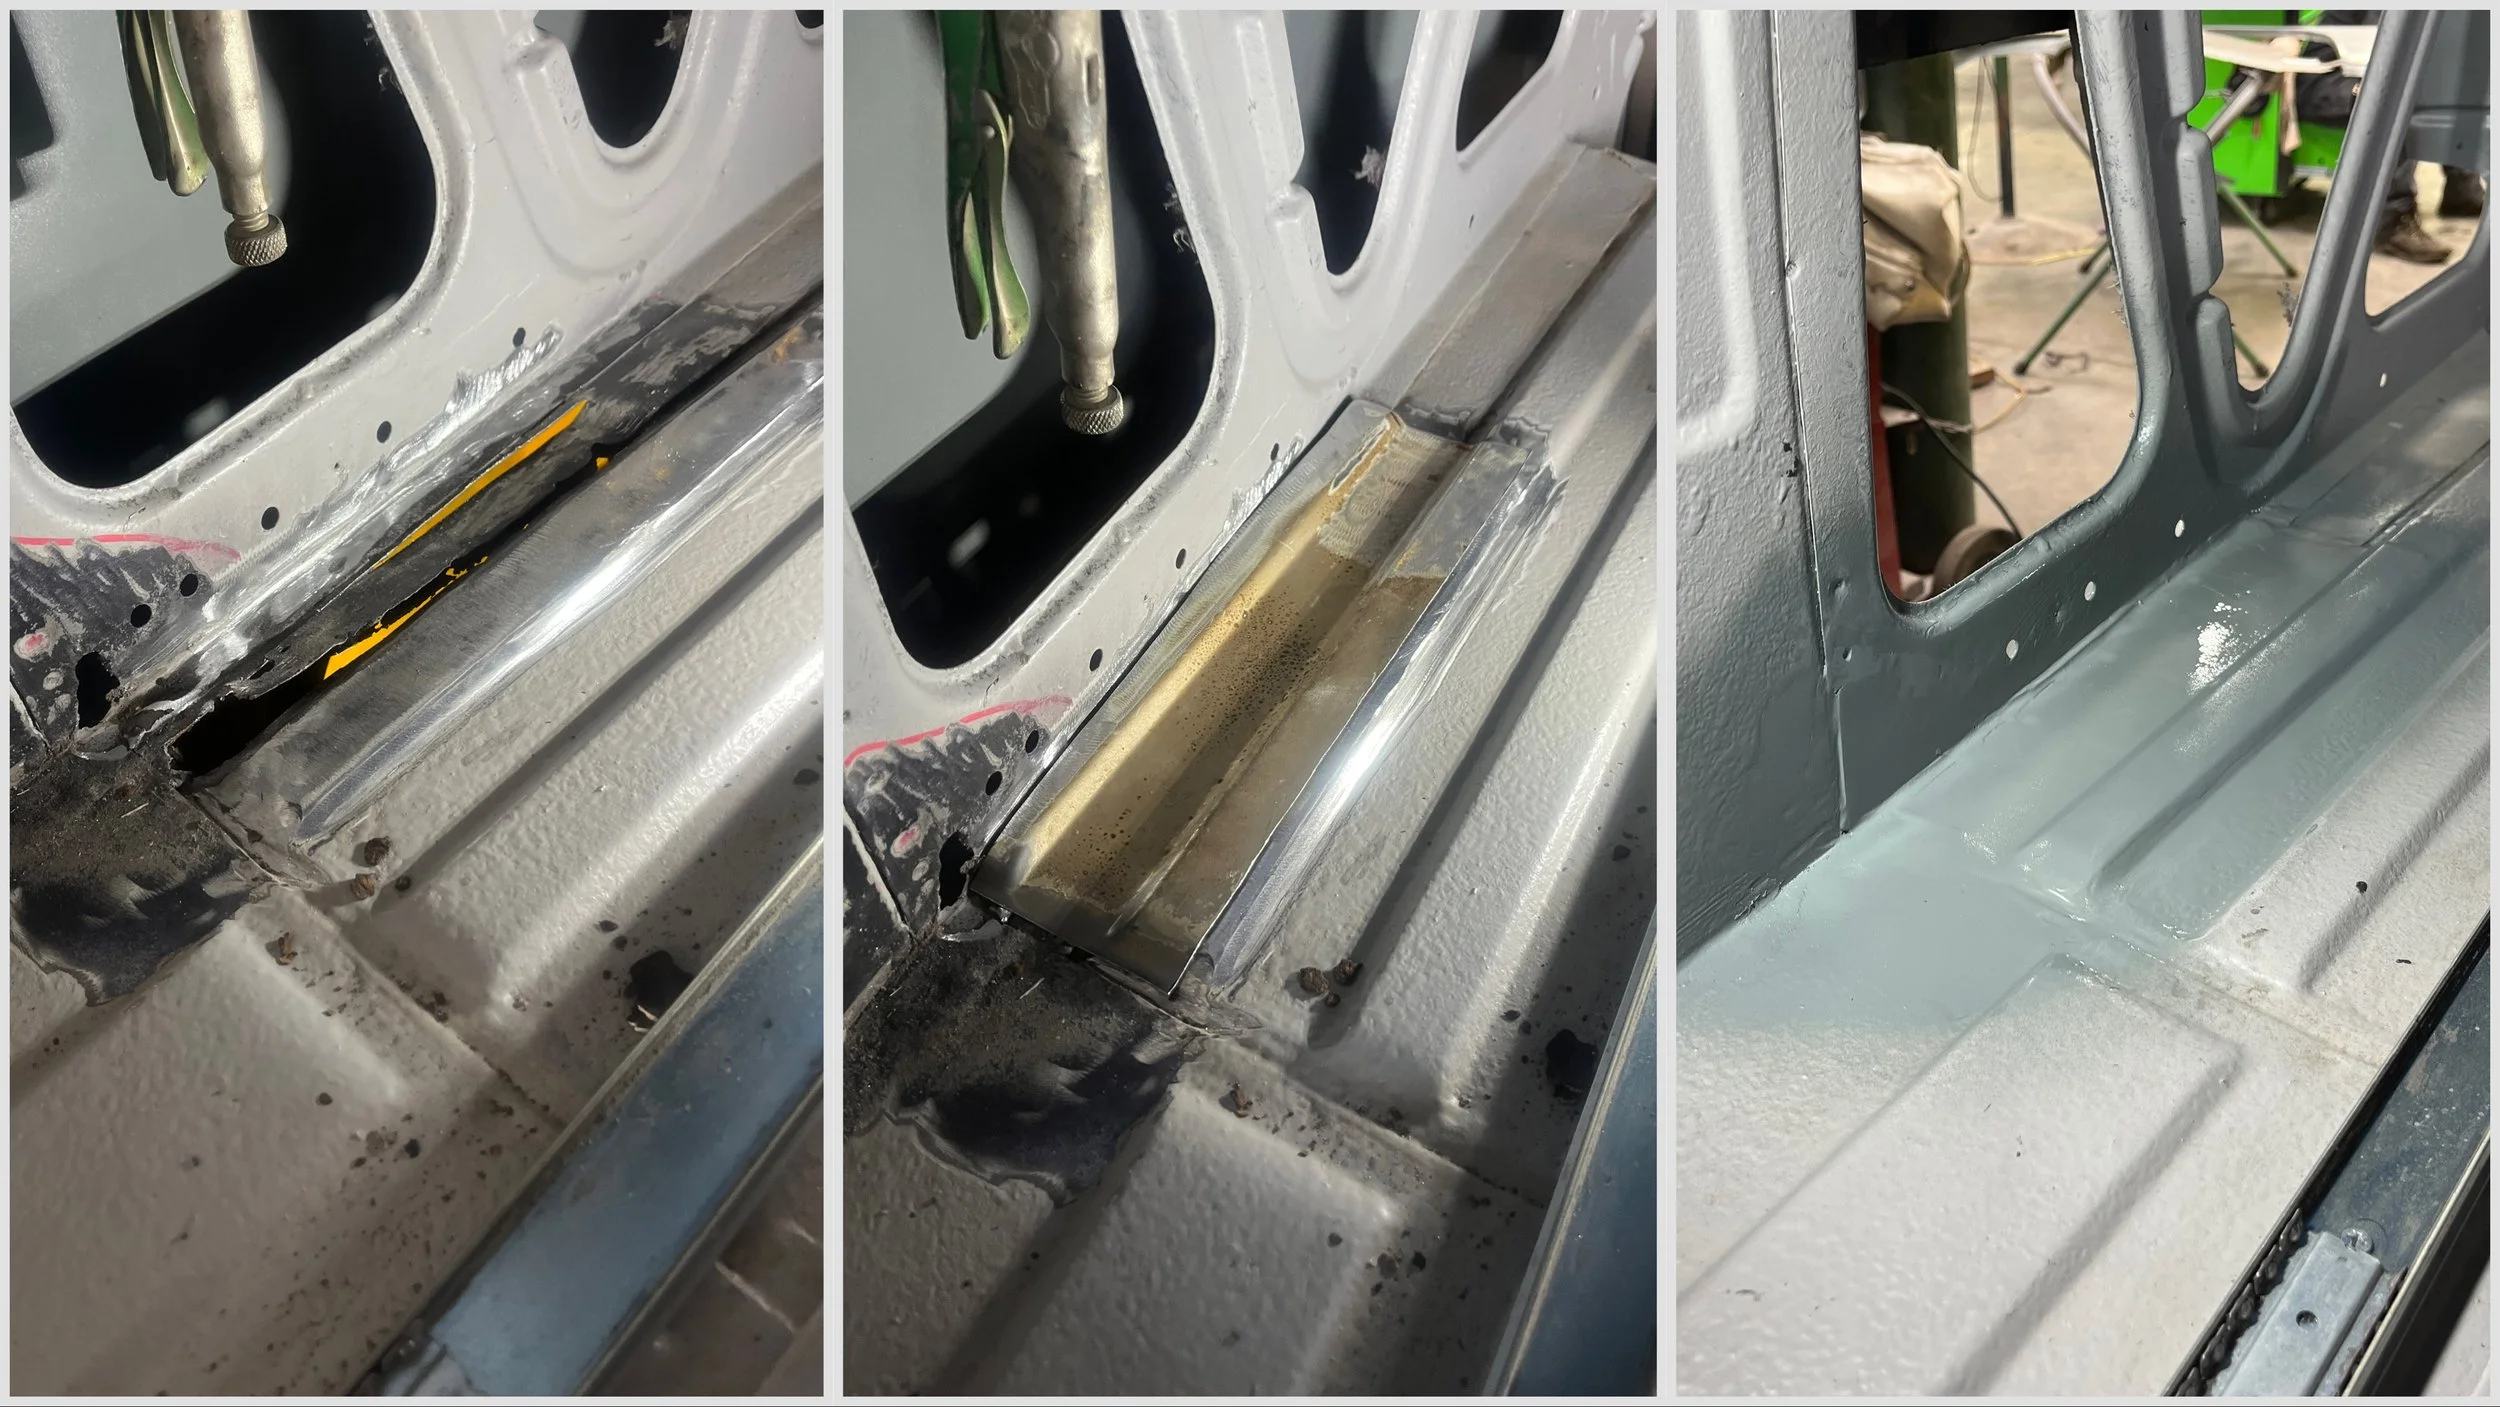
Larry was kind enough to donate a piece of his parts van to the cause. :)

What started as rust repair has turned into a full deep-dive into the van’s structure. But honestly, that’s the only way to do it right.
Where things stand at this stage:
All major rust areas have been identified and addressed
Internal structures have been rebuilt where needed
Passenger side panels are fully installed
Driver’s side is almost completely finished
This process has been a reminder of something important: Old vehicles don’t just carry miles, they carry history. Every patch, shortcut, and previous repair becomes part of what we’re to deal with today.
If you’re curious about the labor cost of this sort of repair, we are currently in for $6,100 with more labor remaining. This is a discounted rate, as Larry is performing this work not in his shop, but in his free time.
If this process has shown us anything so far, it’s that doing it right takes time and money, but it’s worth it. She has brought us so much joy and opportunity! Thank you for reading.